Mounting Translucent YUPO Art
YUPO paper is a popular option for artists who want to paint on translucent paper. A 100% recyclable, waterproof, tree-free synthetic paper made from polypropylene, YUPO was first developed in Japan during the 1970s. It is used extensively in the packaging and labeling industry. However, many artists, especially watercolorists, are embracing it as well. Because of artist demand for this renewable paper source, artist pads of YUPO paper are available in translucent and white.
The see-through nature of translucent YUPO coupled with the delicate color saturation of watercolors makes mounting finished works without a mat board difficult. A Frame Destination customer recently reached out seeking a solution for this obstacle.
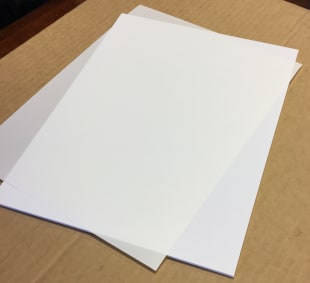
Frame Destination set out to help the customer find a suitable mounting method. We mounted a piece of 9” x 12” translucent YUPO paper, but this method will work for any size and type of paper with a little bit of modification.
The Materials
After examining the paper, we decided that a hinge-mounting method using self-adhesive hinging tissue by Lineco would give us the best results. This pressure-sensitive, lightweight tissue is specifically designed for hanging translucent art. When properly applied, it becomes almost translucent itself.
Lineco’s hinging tissue provides a permanent bond that will remain stable over time and is strong enough to support lightweight, mid-sized art. This archival-quality product has a neutral pH and is acid and lignin free, meaning the tissue itself will not yellow or damage your art.
The Mounting Process
We mounted the 9” x 12” YUPO paper to foam board using two T-hinges. To preserve and protect your art, be sure to choose an acid-free foam board.
Here’s a step-by-step guide to the mounting process we used.
-
- Cut four, two-inch long strips of adhesive tissue. If your art paper is larger, you can make longer hinges or add a third hinge. When the process is finished these hinges will be barely visible, so don’t worry about cutting perfectly even strips.Most picture frames cover about ¼” inch of the image, so if you keep the width of the tissue between 3/16” and 1/4” it should be covered by the frame.
- Peel the paper backing off of the tissue to expose the adhesive side. Separating the paper from the tissue can be tricky, but be gentle so you don’t tear or damage your strips.
- Place one strip of tissue horizontally across the top of your image an inch or two from the board’s corner. Remember to only put about ¼” of the strip on the front side of the mounting board so the hinge is not noticeable in the finished product.
-
- Wrap the remaining tissue over the foam board’s edge and adhere it to the back side of the board.
- Repeat this process for the hinge near the other top corner of the board. If you are working with larger paper and opt to add a third hinge, place it in the middle for added stability.
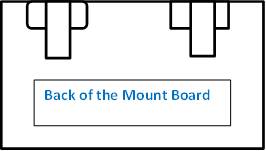
- When both hinges are in place, flip the mount board over so that the back is facing upward. Take another strip
of tissue and place it vertically over the top of the first strip, creating a “T.” Adding this vertical strip
makes the hinge more stable. Don’t forget to stabilize all your hinges.[Image – Live photo of the T hinge]
When you’re done, you should see two T’s on the back top of the mounting board.
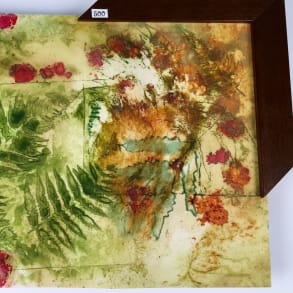
Your mounted YUPO paper is now ready. Flip it back over and start creating! Even without framing your completed work, the hinges are barely visible.
When you use a traditional frame, the hinges will be completely hidden.
This process will let you create beautiful works on YUPO’s translucent paper and frame them cleanly without a mat board to achieve the look you envisioned. The same process can be used with YUPO’s lightweight white paper.


