If you want to hang your framed art or photo on a wall, you’ll need either a picture hanging kit or brackets. Using a hanging kit, however, gives you more flexibility and a lower chance of uneven hanging than brackets because it is wire-based and can easily be adjusted.
All of Frame Destination’s complete metal picture frame packages include a complementary hanging kit. You can also buy individual hanging kits from us compatible with metal side-loading picture frames and metal back-loading picture frames. When you order a complete frame package from us we will automatically include the correct hanging kit for your frame.
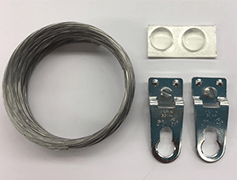
Our side-loading metal picture frame hanging kits include:
- Plastic-coated wire
- Two (2) Omni hangers with screws
- Two (2) self-adhesive wall bumpers
You’ll need a flat-head screwdriver to properly attach the Omni hangers to the frame.
This is step-by-step guide to attaching your hanging kit to your side-loading metal frame. (Please note the hanging kit and instructions for wood frames are different.)
Step-by-Step Instruction
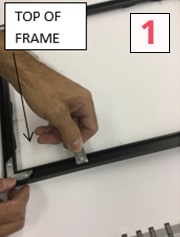 Position the Omni hangers approx. 1/3 of the way down from the frame’s top. Ex: If the frame is 10” high, place the hangers 3” below the top of the frame. | 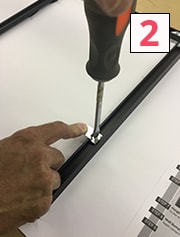 Using a flat-head screwdriver, screw the hangers into the frame’s channel. They should fit snugly. | 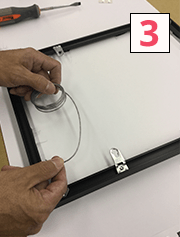 The holes of the hangers should face inward and be even with the top of the frame to properly attach the wire. |
 Thread the wire through the top of the hole in the Omni hanger. | 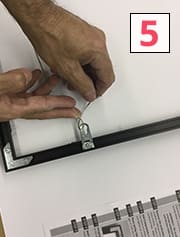 Wrap the wire in the pattern outlined in steps 5-10 to ensure it’s securely attached. |  Pull the end of the wire up to one side of the original wire line. |
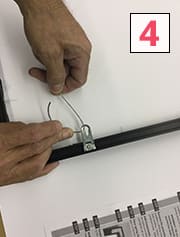
 Cross the end of the wire across the original wire line. | 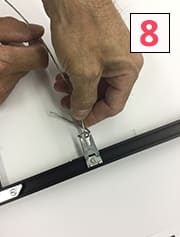 Tuck the end of the wire behind the original wire. | 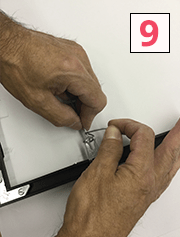 Wrap the end tightly around the original wire line, staying close to the hanger. |
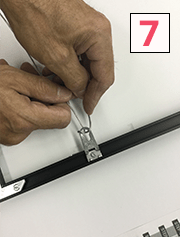
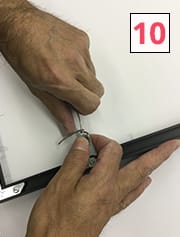 Continue wrapping the end of the wire around the original wire line to form a secure hold. | 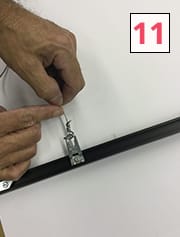 Snip off any excess wire. | 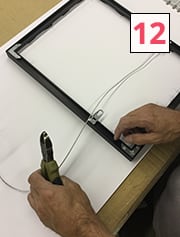 Repeat the procedure on the other side. |
Before repeating the procedure with the second hanger, be sure you leave enough slack in the wire so that the frame hangs at your desired level. Less slack means the frame will not “sink” as much after hanging, while more slack means the frame will sit lower and possibly lean forward.
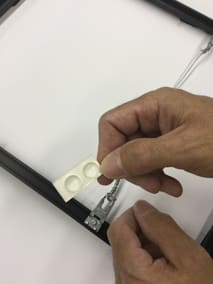
Finally, place on the wall bumpers to the back of the frame, one in each bottom corner. This will protect your wall from being scratched by the frame. Want more framing tips? See our guide to hanging art without nails.

Last Updated November 2, 2021