How to Frame Metal Prints
Want to learn how more about framing metal prints? In our step by step guide, you'll see exactly how it's done!
We’ve heard the question before: can you frame metal prints? As seen in the above photo, the answer is yes — and metal prints look dazzling when put in frames from Frame Destination. Since these prints don’t need acrylic or glass to be displayed safely, ordering a frame for metal prints is easy — but we’ve made it even simpler with a step-by-step guide.
What Are Metal Prints?
When we say “metal print,” we mean dye-sublimation prints. These prints are made by using very high heat and pressure to infuse ink onto the surface of relatively thin aluminum panels — about 0.040 in. thick, which is just under 1/16 inch or about 1 mm. The panels are then coated to allow for glossy, semi-gloss or matte finishes, and some coatings even allow the base metal to show through in some areas of the image for added effect. Popular brands of metal prints include ChromaLuxe® and Unisub®.*
This guide is intended for dye-sublimation prints only, so it is important to ensure you are using this method on the right type of print. Some artwork called “metal prints” could actually have been made by printing on metallic photo paper or inkjet paper. These prints require additional protection, i.e. acrylic or glass glazing. If it appears that you do not have a dye-sublimation metal print, we’ve still got the right frames for you. Check out our standard framing guide or watch a tutorial video to find wood and metal picture frames to display your artwork.
This guide can, however, be used with other types of prints that do not require glazing. Just be sure to account for the thickness of your print and any backing material, which is especially important when choosing points with any of our wood frames.
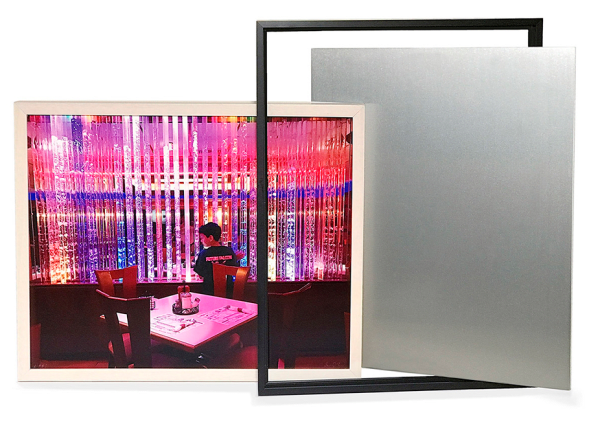
Choosing Between Wood and Metal Frames for Metal Prints
Metal prints are scratch resistant, but just like mats and other art materials, they can be damaged by the sharp edges of a metal frame when inserting the artwork. Even though the prints will be in direct contact with metal when using this approach, we observed no damage to metal prints during initial testing — even after dropping a 16x20-inch framed metal print inside a GalleryPouch™ bag three feet onto a carpeted floor.
However, if you prefer that your metal print not come in direct contact with a metal frame, choose a wood frame instead. With our wood frames, you insert your art into a pre-cut opening in the frame, and flexible “points” are then bent using fingers or a small tool to secure the art and any backing material.
Metal Prints With Hanging Block or Hanging Hardware
If your metal print has a hanging block attached to the back (right), see Option 2.
OPTION 1: Metal Prints Without Hanging Block
This means that there is nothing attached to the back of the metal print.
- Choose a metal picture frame or wood picture frame.
- On the next page, select “Complete Frame” from the top section. If there are multiple colors of the frame available, choose the color.
- On the same page, below “Include Matboard?”, select “Don't include matboard.”
- On the same page, below “Include Glass/Acrylic?”, select “Don't include glass/acrylic.”
- On the same page, below “Include Backing?”, select “Include backing.”
- Click on the green “Customize Frame” button.
- Under “Popular Sizes,” choose your frame size, which should match the size of your metal print. We will allow some extra space inside the frame so that your metal print will fit precisely. If your print size is not shown, check the box next to “Customize this preset frame size.”
- Scroll to “Backing” and choose any type 3/16-inch foamboard, standard or acid-free.
- Only if you are ordering a wood frame: Under “Points,” change the selection in the drop-down from “Fit Contents Ordered” to 1/4 inch.
- That’s it! You are ready to check out.
OPTION 2: Metal Prints With Hanging Block
- Measure the depth of the hanging block. They are normally about 1/2-inch thick.
- Choose a metal picture frame or wood picture frame. with a rabbet that is 1/16 inch larger than the thickness of the hanging block. For example, if the hanging block is 1/2 inch, you need a frame with a rabbet that is at least 9/16-inch thick. Otherwise, the hanging block will push the frame out from the wall. Metal frames such as Profile 117 and wood picture frames such as Profile 503 both have a rabbet of at least 1 inch, which should be deep enough for most hanging blocks.
- On the next page, select “Complete Frame” from the top section. If there are multiple colors of the frame available, choose the color.
- On the same page, leave “Include Matboard?” selected.
- On the same page, below “Include Glass/Acrylic?”, select “Don't include glass/acrylic.”
- On the same page, below “Include Backing?”, select “Don’t include backing.”
- Under “Popular Sizes” and “Need to customize your frame size?”, select “Customize this preset frame size.”
- Measure the size of the hanging block on the back of the print. Enter that size under “Artwork Size.”
- Below the “Artwork Size” width drop-down, change “Artwork Overlap” to -1/4. Note: This must be negative so the mat is cut larger than the hanging block.
- Measure the width and height of the metal print. Enter those dimensions in “Frame Size” under “Custom Sizing”. Ensure that “Mat Size” is not inadvertently selected in this section.
- Under the Mat Options section, select a “Mat Type” of 4Ply Paper Mat White Core and a “Mat Color” of 222 – Smooth White (OS), which is our least expensive matboard.
- If you are ordering a wood frame: Under “Points,” change the drop-down from Fit Contents Ordered to 1/8 inch.
- That’s it! You are ready to check out.
When you receive the frame, place the mat on the back of the metal print, with the hanging block showing through the opening. The mat will protect the back of the metal print from the spring clips on the metal frame or the points on the back of the wood frame. Assemble the frame per the included instructions.