How to Decorate Mat Board
Mat board serves two main purposes: it protects your artwork — keeping your art from touching the glazing — and provides aesthetic interest, as it provides a neat border around the print or photograph. But picture mat board doesn’t just have to be white, off-white or any other solid color. With a bit of creativity, you can decorate mat board to not only make your artwork stand out but personalize it for your home.
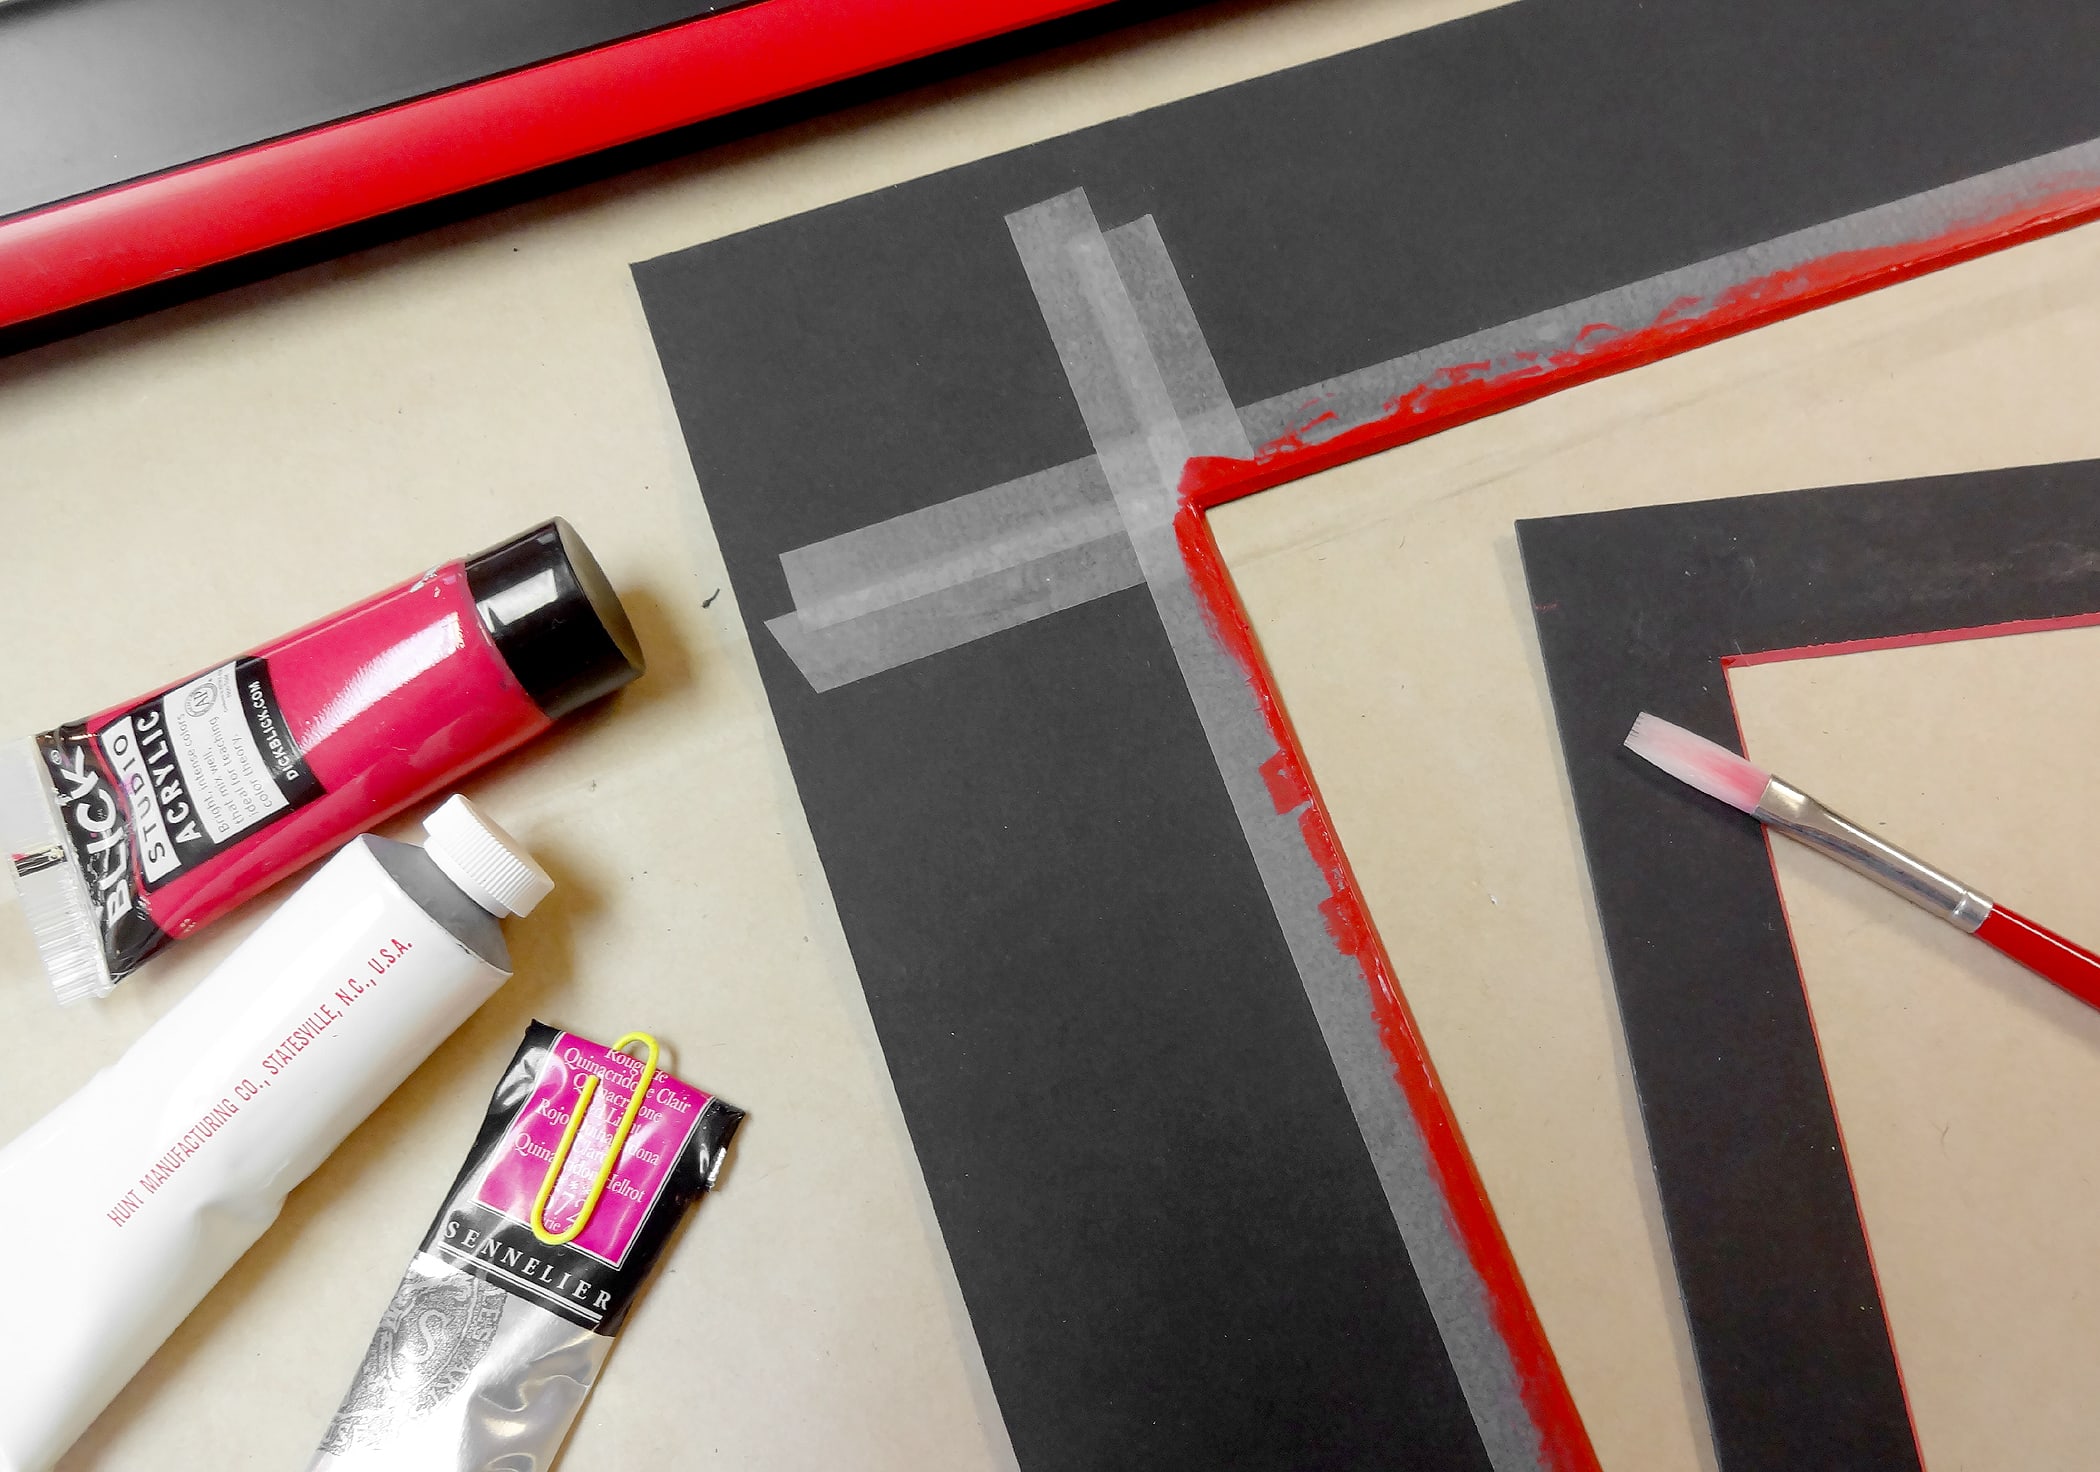
Painted Bevel
A painted bevel is one of the more understated ways to decorate a mat board. Mat boards cut with a bevel — a sloped surface around the inner cut edge — provide the perfect surface to add a pop of color.
What You Need:
Mat board
Water-based markers, or
Acrylic paint and brush, thinned with water if needed
Step 1: Place mat board face up.
Step 2: Hold the mat firmly with one hand and bring the marker or brush downwards in a slow but fluid motion.
Step 3: Rotate the mat board to repeat the same downward motion on the remaining three sides.
If you are worried about getting ink or paint on the face of the mat board, there is another method using tape and acrylic paint. Simply apply a 1-inch-wide strip of removable tape — Chris Paschke recommends 3M Removable 811 tape in her tutorial — along the edge of the bevel to protect the face of the mat board. Use a burnishing bone folder to ensure the tape adheres well to the mat, preventing any paint from seeping underneath. Once you have taped each side of the mat, you can follow the steps above.
Wait until the paint has completely dried to remove the tape; once it is dry, slowly lift and pull the tape backwards to remove. If you see a dusty outline of the tape, use an eraser to remove. Note that Paschke recommends that you use a black eraser if you have a dark colored mat board, as a white eraser will leave a white mark.
You don’t only have to use just one color: you can paint each side a different color, paint dots, or decorate it with other patterns. You can even mimic the artwork inside, painting the mat board bevel in the same color and style to “extend” the artwork to the mat board.
Cut-aways and Accent Cuts
Best used on dark or deeply colored mat boards, according to Master Certified Picture Framer Vivian C. Kistler’s book The Basic Guide to Mat Decoration, cut-aways are exactly that – you simply cut away the surface paper on mat board.
What You’ll Need:
Dark colored mat board
Ruler
Hobby knife
Stencil or traceable design
Removable tape
A soft pencil (e.g. #1, B, 2B, or 3B)
A hard pencil (e.g. #3, H or 2H)
Burnishing bone folder
Step 1: If using a stencil, skip to step 5. Trace or draw a design on the tracing paper.
Step 2: Flip the paper over and, using the soft pencil, coat the back side.
Step 3: Flip the paper back over and tape it onto the mat board where you would like the final design.
Step 4: Using the hard pencil, trace the design once again. Make sure to press hard — but not too hard — to ensure the graphite transfers. Remove the tracing paper.
Step 5: Use the hobby knife to carefully cut only the surface paper – the colored portion – of the mat board along the traced design. If using a stencil, secure it with tape before beginning to cut the mat board.
Step 6: Peel the cut-away portion carefully.
Step 7: Using a bone folder or other round item, burnish, or smooth, the cut edges.
Kistler recommends practicing using the knife before committing to cutting the mat board. To get a better chance of clean, straight cut, use sharp blades and hold the knife with one finger against the flat side of the blade.
Rubber Stamping
Using paint and your favorite rubber stamp — shapes, animals, plants, and letters — you can create unique designs on your mat board.
What You’ll Need:
Mat board
Rubber stamp
Scrap piece of glass, acrylic, or flat tile
Acrylic paint, thinned with water if needed
Paintbrush
Spray bottle filled with water
Step 1: Map out the stamped design on your mat board. Use pencil to mark the locations.
Step 2: Deposit a small amount of the acrylic paint onto the glass, acrylic or tile. Use the paintbrush to spread the paint into a thin, even layer. Test the rubber stamp with the acrylic to make sure it is the right consistency.
Step 3: Press the rubber stamp down a few times in the paint to coat it evenly.
Step 4: Press the stamp firmly and evenly down once on the mat board.
You can repeat this process as many times as you want, but be sure to spray the acrylic for the stamp lightly with water to prevent it from drying. It’s also best to practice a few times on a similarly sized scrap paper to ensure you get the pattern or look you want on the final piece.
Decorative Objects
Attach objects that complement your artwork or add personal meaning, such as a pressed leaf from a photograph of a particularly beautiful fall season.
What You’ll Need:
Mat board
Liquid adhesive
Various lightweight objects, e.g. pressed leaves or flowers, feathers, lace or ribbon, pet ID tags, poker chips or tokens, movie or event tickets, and more
Step 1: Map out where you would like to place your objects.
Step 2: Apply a small amount of adhesive to the object.
Step 3: Place the item gently but firmly on the mat board and let dry.
The items listed above are relatively flat objects that are able to fit in most frames. If you would like to use larger or thicker objects, make sure that the frame and mat board can support their weight it and that the frame is deep enough to accommodate the size of the objects.