How to Assemble Metal Picture Frames
Step by step instructions for assembling a metal picture frame
Items Used in Assembly
Guide Or watch our video guide below
This is a side-loading frame. That means that one side of the picture frame must be taken off. This allows the glazing, matting, and backboard to be removed so that the artwork can be mounted.
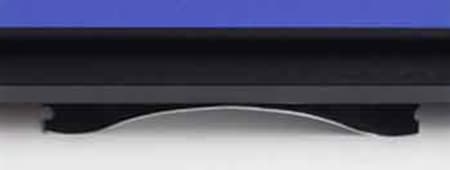
Remove the spring clips
Remove the spring clips, which hold the frame contents against the front of the frame. Carefully remove the spring clips using a small screwdriver or awl to catch the cutout area on the end of each clip to gently remove it from under the frame. Be careful when removing them because they are spring-loaded and can pop up.
Remove one side of the frame
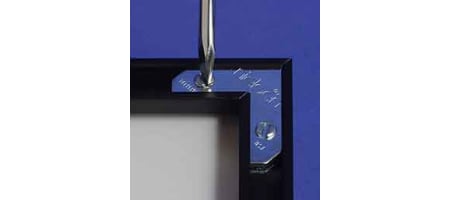
Using a flat head screwdriver, loosen one screw in the corner mounts at both ends of the side you chose to remove.
Remove components
Remove the glazing, mat and backboard from the frame.
Mount picture
Mount the picture to the mat or backboard with acid free hinging tissue or tape. We recommend the picture be mounted at just 2 or 3 (panoramic) points along the top. The picture and the mat or backboard will not expand and contract equally through temperature and humidity changes. This may cause waves to form in the picture if it is affixed too securely to the backboard or mat.
Remove acrylic coating
Remove acrylic coating. Make sure your work area is clean and free of dust. Static may build up on the glazing causing it to attract dust and other loose debris. We leave the protective coating on during shipment to ensure the glazing arrives in perfect condition.
Plastic covering should peel right off. Paper covering comes off more easily by rolling it off using a cardboard tube. Learn more in our guide.
Assemble
Insert the glazing, mat and backboard back into the frame and reassemble the side that was removed.
Replace spring clips
Replace the spring clips on each side of the frame. Larger frames are shipped with extra clips that you can install at this time. Spring clips can be left out if the gap is 1/16 inch or less.
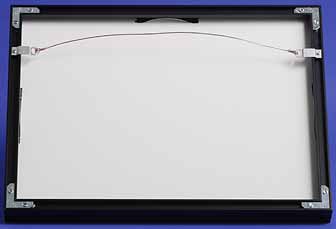
Hanging wire mounts
Insert the hanging wire mounts into the appropriate sides of the frame. You may need to loosen the screw in the mount before you can insert it into the groove on the back of the frame. Tighten the screw on each mount to secure them in place.
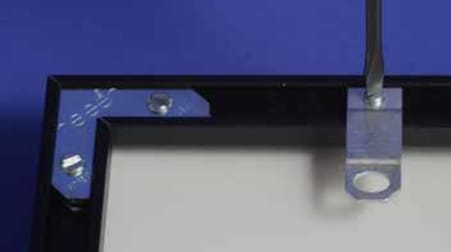
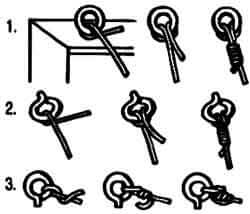
Attach hanging wire
Attach the hanging wire to the wire mounts and tie it off.
Wall corner protectors
Attach the wall corner protectors to the two lower corners of the metal picture frame.
Display
Hang your beautiful artwork and enjoy!