These cardboard picture frame corners are easily assembled in just seconds and can be removed and reused. They include a tab that allows them to lock on the moulding so they do not fall off when the picture frame is being transported.
- Put the corner, brown side up, in front of you on a flat surface, as shown above.
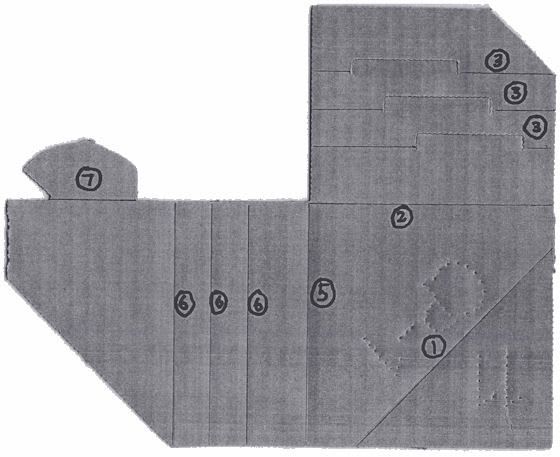
- Note the diagonal crease at the lower right and fold it up and over as far as it will go (Step (1)). It is the locking flap which usually keeps the corner from falling off your picture frame. You can release it after pre-folding it.
- Note in the upper right part of the corner there are three slots. This allows you to fold the corner three ways for three different thicknesses to fit your particular picture frame.
- Fold up (toward you) on the main crease (Step (2)) and then fold up on whichever slot is appropriate for your picture frame (Step (3)). You can release it after pre-folding it.
- You can then move to the left side of the corner and fold on the main crease (Step (5)) and then the corresponding crease to match the create you folded in Step (3) (Step (6)). You can release it after pre-folding it.
- You have now pre-folded the corner and are ready to finish its assembly.
- Fold up the lower right triangle (see Step (1)). Hold it down with your right thumb. While holding it down, fold down the upper right flap (see Steps (2) and (3)).
- While holding the previous two pieces in your right hand, use your left hand to fold over the lefthand flap over the first two pieces.
- Fold down (away from you) the small tag (Step (7)) and insert it in the slot which is under it.
- Presto! These are a lot of instructions for something that will seem very simple after you've folded a few of these corners.